News and insights on animal health management for working and farm animals

Category: Technology & Research

Lameness Prevention in Dairy Cattle: Practical Hoof Care Protocols

Lameness Prevention in Dairy Cattle: Practical Hoof Care Protocols

Focus on hooves every day and you catch most problems before they turn into lameness cases. The routine below comes from what actually works in freestall and tie-stall herds.

Daily Walk-Through Checks

Walk the herd once after milking while cows are standing. You spot changes faster this way than during rest.

  • Look for cows that shift weight or stand with one hoof lifted.
  • Check for swelling above the hoof or dark lines in the sole when cows step onto concrete.
  • Note any fresh blood or manure packed between the claws.

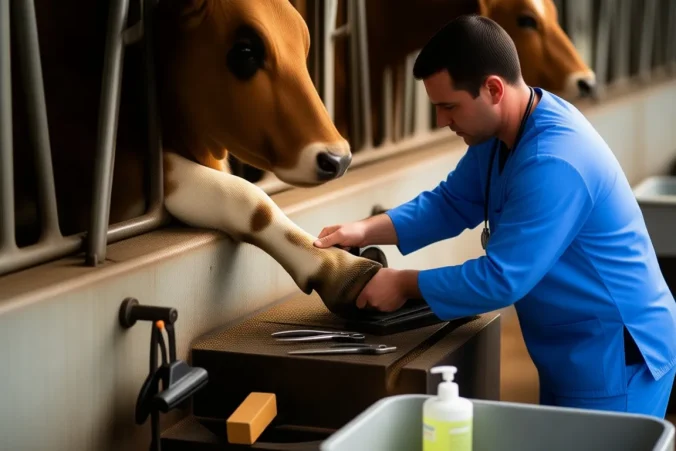
Pull those cows the same day for a closer look on the tilt table. One missed case spreads fast in the group.

Hoof Trimming Schedule and Steps

Most herds need every cow trimmed twice a year. Mark the calendar for spring and fall and add extra checks for high producers.

  1. Start with the outer claw. Trim it level so it bears weight evenly.
  2. Remove only the excess horn on the inner claw. Leave enough sole thickness.
  3. Shape the heel so the cow stands flat on both claws.
  4. Check the interdigital space and clear any loose skin or dirt before releasing the cow.

Cows trimmed this way usually stay sound through the next lactation cycle.

Footbath Setup and Use

A working footbath sits right after the parlor exit so every cow steps through. Change the solution after 150 to 200 cow passes.

Solution Mix rate Best used
Copper sulfate 5% in water Twice weekly in wet seasons
Formalin 3-5% When digital dermatitis pressure is high
Zinc sulfate 10% Alternate weeks with copper

Keep the bath depth at 10 cm so the solution reaches the coronary band. Skip the bath on cows with open wounds until they heal.

Housing Adjustments That Protect Hooves

Concrete wears horn faster than pasture. Add rubber mats in the holding area and parlor exit lanes first. Those spots see the most traffic.

Bedding depth matters more than type. Aim for at least 15 cm of dry sawdust or sand so cows can stand without shifting weight to the toes. Scrape alleys twice daily so manure does not stay packed against the heels.

If you see more lameness on one side of the barn, check the floor slope and fix drainage before the next trim cycle.
Nutritional Strategies to Boost Immunity in Transported Livestock

Nutritional Strategies to Boost Immunity in Transported Livestock

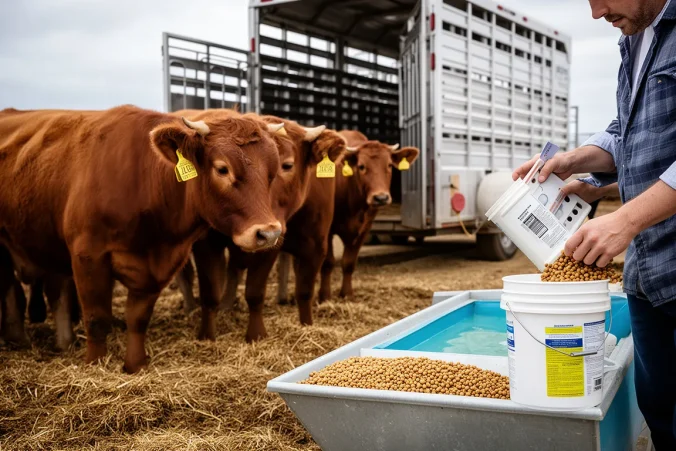
You can raise resistance to stress and illness by changing what and when animals eat in the days right before a haul. The steps below work for cattle, sheep, and goats on trips that last six hours or more.

Start Feed Changes Three Days Out

Begin adjustments early so rumen bugs have time to adapt. Skip last-minute big shifts that can drop intake.

  • Raise vitamin E to 400 to 600 IU per head daily for cattle.
  • Add 0.3 percent zinc from an organic source in the total mixed ration.
  • Keep forage quality steady and avoid sudden grain increases that cause loose manure.

Key Nutrients and Daily Targets

These four items give the clearest payoff during transport stress.

Nutrient Target per head Example for 500 kg steer
Vitamin E 500 IU Top-dress 5 g of 50 percent E premix
Zinc 30 to 40 mg/kg DM Include chelated zinc in mineral pack
Vitamin A 50,000 IU Use in the same premix
Selenium 0.3 mg/kg DM Blend with salt at 90 ppm

Load-Day Electrolyte Checklist

  1. Weigh or estimate total body weight of the group.
  2. Mix electrolyte powder at 2 g per kg body weight into 10 liters of water per animal.
  3. Offer the mix 45 minutes before loading; most cattle drink 4 to 6 liters.
  4. Skip if animals already have free-choice water and salt.

Handle Transit with Simple Additions

Once animals are on the truck, water access and small feed top-ups matter most. On trips over eight hours, stop every four to six hours and let them drink. Add a probiotic paste at the first stop for groups that look tight in the gut. One 10 g dose per head of a multi-strain product is enough for most 400 kg animals.

Recovery After Unloading

Give animals access to long-stem hay within 30 minutes of arrival. Hold off on heavy grain for the first 12 hours so they can rehydrate. Check manure consistency the next morning; if it is still firm after 24 hours, add another round of electrolytes in the water tank.

Joint Health in Equestrian Athletes: From Diagnosis to Long-Term Care

Joint Health in Equestrian Athletes: From Diagnosis to Long-Term Care

Track the exact moments your knees or hips complain during a ride. That record becomes your starting point for every decision that follows.

Recognizing Early Warning Signs

You know the feeling after a long jump school when one knee swells by evening. Riders often notice the same pattern after sitting deep in the saddle for collection work.

  • Stiffness that lasts more than twenty minutes after dismounting
  • Sharp pain on the inside of the knee when posting at the trot
  • Hip clicking that appears only after a full day of lessons
  • Lower back ache that wakes you at night after a fall two weeks earlier

Getting an Accurate Diagnosis

Start with your regular physician and ask for a referral to a sports-medicine doctor who sees riders. Bring your ride log and photos of any swelling.

  1. Describe the exact movement that triggers pain, not just general soreness
  2. Request weight-bearing X-rays plus an ultrasound if fluid is present
  3. Schedule an MRI only after the first two steps if symptoms persist past ten days
  4. Ask whether the joint issue ties to your stirrup length or saddle fit

Handling the First Month of Recovery

Most riders need two to four weeks of modified activity rather than total rest. Keep your horse in work with a student or groom so you stay mentally sharp.

Week Activity Level Example
1-2 Groundwork only Hand walking and light lunging from the center
3 Short mounted sessions 15 minutes walk-trot on a quiet horse
4 Build back gradually Add canter only if no swelling appears the next morning
  • Ice the joint for ten minutes after every ride or barn chore
  • Switch to a mounting block on the opposite side to reduce torque
  • Check saddle panels for even pressure before each session

Daily Habits That Protect Joints

Small changes compound. Riders who stretch their hip flexors for five minutes before tacking up report less morning stiffness within three weeks.

  • Do single-leg balance drills on a folded towel while brushing your horse
  • Keep a foam roller by the tack room door and use it on the quads after every ride
  • Choose half chaps with extra knee padding if you school over fences daily
  • Swap one high-impact jump day per week for flatwork with transitions

Sustaining Mobility Over the Years

Plan check-ins every six months with the same sports-medicine doctor. Riders who do this catch early cartilage wear before it limits their ability to post.

Keep a simple notebook in your tack trunk. Note any new ache, how long it lasted, and what you changed in the saddle or stirrups. Patterns show up faster than memory allows.

Reassess your saddle fit whenever you add or lose five pounds. Even small shifts change how your pelvis loads the hip joints during sitting trot.

How to Recognize Early Signs of Respiratory Disease in Feedlot Cattle

How to Recognize Early Signs of Respiratory Disease in Feedlot Cattle

You catch most respiratory cases early by walking pens at the same time each morning and noting which animals skip the bunk or lag behind the group.

Check Feed Intake First

Feed disappearance tells you a lot before any animal looks sick. Walk the bunks and count untouched or half-eaten spots.

  • A steer that normally finishes its ration but leaves 30 percent or more is worth a closer look.
  • Whole pens that clean up slower than the day before often signal the start of an outbreak.
  • Mark the head number on your sheet so you can find the same animal again after the rest have moved.

Watch Breathing and Posture

Normal cattle breathe quietly at rest. Stand still for a minute and count flank movements on any animal that stands apart.

  • More than 40 breaths per minute at rest points to trouble, especially if the animal extends its neck slightly to breathe.
  • A short, dry cough that starts when the group moves is common in early cases.
  • Watch for animals that keep their head lower than usual while standing; they are conserving effort.

Look at Eyes, Nose, and Ears

Discharge and ear position change quickly. Get close enough to see both sides of the face on marked animals.

  • Clear or slightly cloudy nasal discharge that starts in one nostril often appears first.
  • One or both ears held lower than the others can mean fever or pain from the lungs.
  • Dull eyes with reduced blink rate show up before the animal becomes obviously depressed.

Take Temperatures on Suspects

Only pull animals that show two or more of the signs above. A quick rectal temperature confirms the next step.

Reading Action
Under 103.5 F Watch again at evening walk; record intake
103.5 to 104.5 F Pull to hospital pen and start first treatment
Over 104.5 F Pull immediately and check for secondary issues

Write the number and time on the same sheet you used at the bunk so the evening crew knows exactly which animals need rechecking.

Welfare Considerations During Livestock Transport: Best Practices and Legal Updates

Welfare Considerations During Livestock Transport: Best Practices and Legal Updates

You move animals every week. The key is keeping stress low so they arrive in decent condition and you stay on the right side of inspectors.

Load and unload to cut stress

Start with the trailer. Sweep it clean, bed it properly, and check every gate latch before the first animal steps on. Load in small groups rather than a full pen at once. Pigs slip on smooth floors, so lay down rubber mats or extra straw on ramps.

  1. Sort animals by size in the pens the night before so you are not mixing strangers at the last minute.
  2. Walk the route from pen to trailer yourself to spot loose boards or sharp edges.
  3. Load the calmest animals first and the ones that have already been handled near the door last.
  4. Once everyone is on board, wait five minutes before closing the rear gate so any animal that wants to turn around can settle.

Watch conditions while moving

Most problems happen after the wheels start turning. Temperature shifts fast in a moving trailer, and animals cannot move away from drafts or direct sun. Pull over every 90 minutes on longer hauls and walk the outside to listen and smell.

  • For cattle in summer, open side vents fully but keep the top row closed on the sunny side to block direct light.
  • Feeder pigs in winter need extra bedding and a solid windbreak panel on the front; they lose heat quickly when wet.
  • If you hear repeated vocalizing after the first 30 minutes, stop and check for an animal down or one that got separated from its group.
  • Carry a simple log: time, outside temp, and any stops. It takes 30 seconds per entry and satisfies most inspectors.

Stay on top of current rules

Regulations change by state and sometimes by species. Check the federal 28-hour rule first, then the specific state requirements for your route.

Update What changed Practical step
2023 EU-aligned rules in some states Space allowances increased 8% for calves under 6 months Re-measure your trailer compartments before the next calf run
Watering interval Now listed at 12 hours max for hogs in transit in three states Carry a portable water tank and plan a stop every 10 hours instead
Driver training logs Digital records accepted if they include temperature readings Switch to a phone app that timestamps photos of the trailer

Call the destination state’s agriculture department the day before if your load crosses a new border. One phone call prevents a 4-hour hold at the scale.

Biosecurity Basics for Small-Scale Sheep and Goat Farms

Biosecurity Basics for Small-Scale Sheep and Goat Farms

You already know a single sick animal can move through a small herd fast. The steps below focus on the routines that actually limit spread on farms with 10 to 80 head.

Quarantine New Arrivals

Every new sheep or goat enters the same process, whether it came from a sale barn or a neighbor.

  1. Unload the animal straight into a pen at least 50 feet from the main group. Use a separate water and feed source.
  2. Keep it there for 21 to 30 days. Watch twice daily for coughing, scours, or limping.
  3. Have your vet pull blood for CL, Johne’s, and CAE on day 3 and again on day 21 if the source herd history is unknown.
  4. Only move the animal once both tests come back clear and no symptoms appear.

One ewe bought at auction last spring carried footrot. The 30-day hold caught it before she joined the flock and saved months of hoof trimming.

Daily Movement and Visitor Rules

Most disease arrives on boots, tires, or borrowed equipment rather than in new stock.

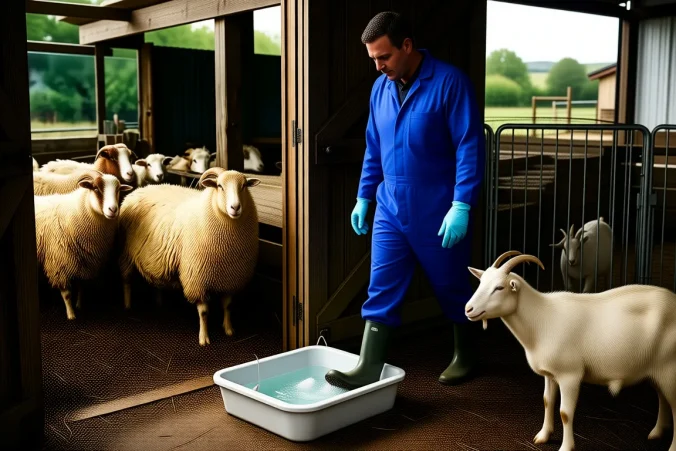
  • Keep a boot brush and bucket of disinfectant at every gate. Scrub and dip before you cross into a new pen.
  • Change coveralls or at least the outer layer when you move from the isolation pen back to the main herd.
  • Ask visitors to park outside the fence line and wear farm boots you provide. Log their last farm visit in a notebook by the gate.
  • Never share drench guns, hoof trimmers, or shearing blades between farms without a full bleach soak and rinse.
Task When Example
Boot dip Every gate crossing After checking the ram pasture
Clothing change After isolation pen Before feeding the does
Equipment clean After each use across farms Shears returned from neighbor

Track these three habits for two weeks and you will see where the gaps actually sit on your place.