News and insights on animal health management for working and farm animals

Author: admin (Page 1 of 2)

Lameness Prevention in Dairy Cattle: Practical Hoof Care Protocols

Lameness Prevention in Dairy Cattle: Practical Hoof Care Protocols

Focus on hooves every day and you catch most problems before they turn into lameness cases. The routine below comes from what actually works in freestall and tie-stall herds.

Daily Walk-Through Checks

Walk the herd once after milking while cows are standing. You spot changes faster this way than during rest.

  • Look for cows that shift weight or stand with one hoof lifted.
  • Check for swelling above the hoof or dark lines in the sole when cows step onto concrete.
  • Note any fresh blood or manure packed between the claws.

Pull those cows the same day for a closer look on the tilt table. One missed case spreads fast in the group.

Hoof Trimming Schedule and Steps

Most herds need every cow trimmed twice a year. Mark the calendar for spring and fall and add extra checks for high producers.

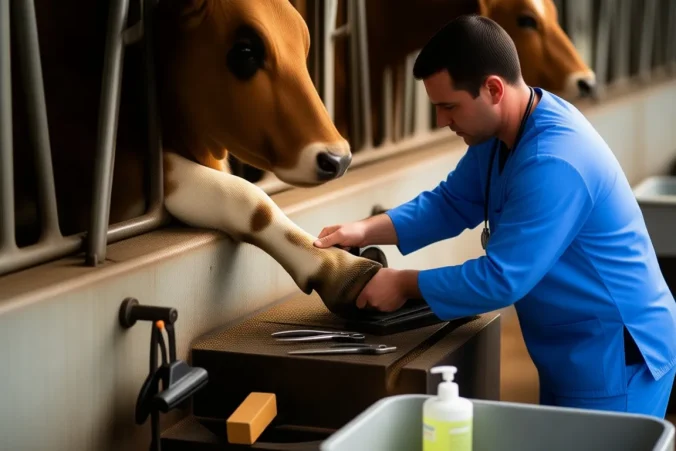
  1. Start with the outer claw. Trim it level so it bears weight evenly.
  2. Remove only the excess horn on the inner claw. Leave enough sole thickness.
  3. Shape the heel so the cow stands flat on both claws.
  4. Check the interdigital space and clear any loose skin or dirt before releasing the cow.

Cows trimmed this way usually stay sound through the next lactation cycle.

Footbath Setup and Use

A working footbath sits right after the parlor exit so every cow steps through. Change the solution after 150 to 200 cow passes.

Solution Mix rate Best used
Copper sulfate 5% in water Twice weekly in wet seasons
Formalin 3-5% When digital dermatitis pressure is high
Zinc sulfate 10% Alternate weeks with copper

Keep the bath depth at 10 cm so the solution reaches the coronary band. Skip the bath on cows with open wounds until they heal.

Housing Adjustments That Protect Hooves

Concrete wears horn faster than pasture. Add rubber mats in the holding area and parlor exit lanes first. Those spots see the most traffic.

Bedding depth matters more than type. Aim for at least 15 cm of dry sawdust or sand so cows can stand without shifting weight to the toes. Scrape alleys twice daily so manure does not stay packed against the heels.

If you see more lameness on one side of the barn, check the floor slope and fix drainage before the next trim cycle.
Nutritional Strategies to Boost Immunity in Transported Livestock

Nutritional Strategies to Boost Immunity in Transported Livestock

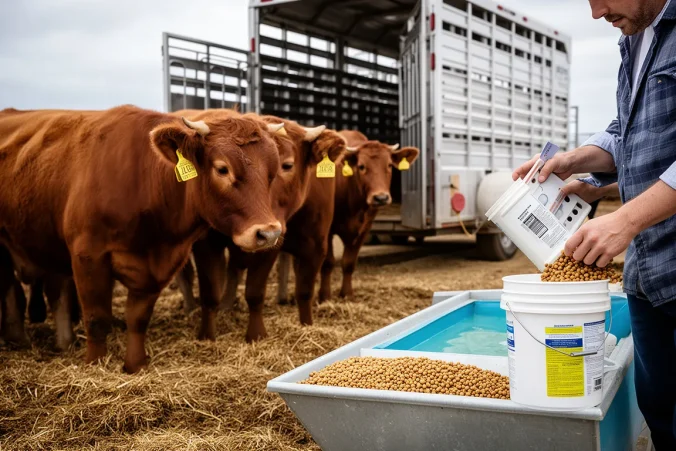
You can raise resistance to stress and illness by changing what and when animals eat in the days right before a haul. The steps below work for cattle, sheep, and goats on trips that last six hours or more.

Start Feed Changes Three Days Out

Begin adjustments early so rumen bugs have time to adapt. Skip last-minute big shifts that can drop intake.

  • Raise vitamin E to 400 to 600 IU per head daily for cattle.
  • Add 0.3 percent zinc from an organic source in the total mixed ration.
  • Keep forage quality steady and avoid sudden grain increases that cause loose manure.

Key Nutrients and Daily Targets

These four items give the clearest payoff during transport stress.

Nutrient Target per head Example for 500 kg steer
Vitamin E 500 IU Top-dress 5 g of 50 percent E premix
Zinc 30 to 40 mg/kg DM Include chelated zinc in mineral pack
Vitamin A 50,000 IU Use in the same premix
Selenium 0.3 mg/kg DM Blend with salt at 90 ppm

Load-Day Electrolyte Checklist

  1. Weigh or estimate total body weight of the group.
  2. Mix electrolyte powder at 2 g per kg body weight into 10 liters of water per animal.
  3. Offer the mix 45 minutes before loading; most cattle drink 4 to 6 liters.
  4. Skip if animals already have free-choice water and salt.

Handle Transit with Simple Additions

Once animals are on the truck, water access and small feed top-ups matter most. On trips over eight hours, stop every four to six hours and let them drink. Add a probiotic paste at the first stop for groups that look tight in the gut. One 10 g dose per head of a multi-strain product is enough for most 400 kg animals.

Recovery After Unloading

Give animals access to long-stem hay within 30 minutes of arrival. Hold off on heavy grain for the first 12 hours so they can rehydrate. Check manure consistency the next morning; if it is still firm after 24 hours, add another round of electrolytes in the water tank.

Joint Health in Equestrian Athletes: From Diagnosis to Long-Term Care

Joint Health in Equestrian Athletes: From Diagnosis to Long-Term Care

Track the exact moments your knees or hips complain during a ride. That record becomes your starting point for every decision that follows.

Recognizing Early Warning Signs

You know the feeling after a long jump school when one knee swells by evening. Riders often notice the same pattern after sitting deep in the saddle for collection work.

  • Stiffness that lasts more than twenty minutes after dismounting
  • Sharp pain on the inside of the knee when posting at the trot
  • Hip clicking that appears only after a full day of lessons
  • Lower back ache that wakes you at night after a fall two weeks earlier

Getting an Accurate Diagnosis

Start with your regular physician and ask for a referral to a sports-medicine doctor who sees riders. Bring your ride log and photos of any swelling.

  1. Describe the exact movement that triggers pain, not just general soreness
  2. Request weight-bearing X-rays plus an ultrasound if fluid is present
  3. Schedule an MRI only after the first two steps if symptoms persist past ten days
  4. Ask whether the joint issue ties to your stirrup length or saddle fit

Handling the First Month of Recovery

Most riders need two to four weeks of modified activity rather than total rest. Keep your horse in work with a student or groom so you stay mentally sharp.

Week Activity Level Example
1-2 Groundwork only Hand walking and light lunging from the center
3 Short mounted sessions 15 minutes walk-trot on a quiet horse
4 Build back gradually Add canter only if no swelling appears the next morning
  • Ice the joint for ten minutes after every ride or barn chore
  • Switch to a mounting block on the opposite side to reduce torque
  • Check saddle panels for even pressure before each session

Daily Habits That Protect Joints

Small changes compound. Riders who stretch their hip flexors for five minutes before tacking up report less morning stiffness within three weeks.

  • Do single-leg balance drills on a folded towel while brushing your horse
  • Keep a foam roller by the tack room door and use it on the quads after every ride
  • Choose half chaps with extra knee padding if you school over fences daily
  • Swap one high-impact jump day per week for flatwork with transitions

Sustaining Mobility Over the Years

Plan check-ins every six months with the same sports-medicine doctor. Riders who do this catch early cartilage wear before it limits their ability to post.

Keep a simple notebook in your tack trunk. Note any new ache, how long it lasted, and what you changed in the saddle or stirrups. Patterns show up faster than memory allows.

Reassess your saddle fit whenever you add or lose five pounds. Even small shifts change how your pelvis loads the hip joints during sitting trot.

The Role of Probiotics in Ruminant Gut Health: What the Latest Research Says

The Role of Probiotics in Ruminant Gut Health: What the Latest Research Says

Probiotics stabilize rumen pH and microbial balance in cattle and sheep. Recent trials show clear drops in acidosis and better feed efficiency when producers add the right strains at the right time.

Putting Probiotics into Daily Rations

Start with your current diet. High-grain mixes often push rumen pH below 5.8. Adding a daily dose of live cultures counters that shift before it turns into off-feed days.

  • Give 10^9 CFU of Lactobacillus plantarum per head in the TMR for dairy cows on 60 percent concentrate.
  • Check manure score three days after you begin. Firmer pats usually appear by day four when the rumen settles.
  • Store the product below 25 C and use it within 30 days of opening to keep viable counts high.

Sheep on pasture need smaller amounts. One gram of a mixed Bacillus and Enterococcus product per 50 kg body weight works for most flocks during spring flush.

What Recent Trials Report on Performance

University work from 2022-2023 tracked 240 Holstein cows across two seasons. Cows that received a daily multi-strain probiotic produced 1.8 kg more fat-corrected milk and showed half the cases of clinical ketosis compared with controls.

Strain mix Animal group Observed change
L. acidophilus + B. subtilis Lactating cows Rumen pH stayed above 6.0 for 18 more hours per day
E. faecium alone Feedlot steers Average daily gain rose 0.11 kg with no extra antibiotic use

Check labels for guaranteed CFU counts rather than vague “probiotic blend” wording. Track body condition and milk components for four weeks after you switch products so you know what actually moved the numbers on your farm.

Understanding Pain Recognition in Donkeys and Mules

Understanding Pain Recognition in Donkeys and Mules

You notice pain in donkeys and mules through quiet changes rather than loud complaints. These animals often mask discomfort, so you catch it by tracking their normal patterns each day.

Why Their Pain Looks Different

Donkeys and mules evolved to stay still when they hurt. A horse might limp or call out, but these animals just stop moving much or turn their head away from feed.

Watch what happens at feeding time. A mule that normally cleans its bucket might take a few bites then walk off. That small drop in appetite often appears before any posture change.

Signs That Show Up in Real Situations

  • A donkey stands with its weight shifted back but still eats hay when you offer it by hand.
  • The mule that usually follows you to the gate now waits for you to come to it.
  • Ears stay pinned back during grooming even though nothing touches a sore spot.
  • Manure piles look smaller or drier than the day before.

Check these points at the same time each morning. One changed item on its own rarely means much, but two or three together point to discomfort.

Daily Field Checks

  1. Walk past the animal first and note whether it turns its head toward you.
  2. Offer a handful of feed and count how many bites it takes before it stops.
  3. Run your hand along the back and watch for any flinch or ear movement.
  4. Look at the feet and legs while the animal stands square; note any resting of a limb.
Check Normal Possible Pain
Greeting Steps forward Stays put
Appetite Finishes portion Leaves half
Posture Even weight One hip dropped

Emergency First Aid for Working Animals: A Step-by-Step Guide for Farmers

Emergency First Aid for Working Animals: A Step-by-Step Guide for Farmers

When a working dog or horse goes down in the field, you need clear steps you can follow right away. Most farm injuries happen during routine tasks, so we focus on what actually shows up.

Keep a Kit That Matches Your Animals

Store supplies where you can reach them in under two minutes. A basic kit for horses, cattle, and farm dogs covers the injuries we see most.

  • Pressure bandages and rolls of gauze for bleeding wounds
  • Antiseptic solution and saline for flushing cuts from barbed wire or nails
  • Digital thermometer and stethoscope to check vital signs before the vet arrives
  • Splint material and duct tape for temporary limb support on a limping horse
  • Phone numbers for your regular vet and the nearest emergency clinic taped inside the lid

Work Through the First Five Minutes

Secure the scene so you do not get hurt too. Then check the animal in this order.

  1. Move other animals away and tie or pen the injured one if it can stand.
  2. Look for bleeding that will not stop on its own. Press firmly with clean gauze for at least three minutes before checking again.
  3. Feel for a pulse at the jaw or inner thigh and count breaths for fifteen seconds, then multiply by four. Normal rates for adult horses sit around eight to twelve breaths; dogs run higher, near fifteen to thirty.
  4. Flush any open wound with saline or clean water and cover it to keep dirt out until you can do more.

A common case is a cattle dog that catches a hind leg in a gate. Once the leg is freed, we stop bleeding first, then check whether the dog can put weight on the foot before deciding on transport.

Decide on Next Actions

Sign you notice What to do next
Heavy bleeding that restarts after pressure Keep pressure on and load the animal for the clinic
Labored breathing or gums that stay pale when pressed Call the vet immediately while you keep the animal quiet and warm
Swollen limb after a kick or fall, but animal still eats and drinks Apply cold packs, limit movement, and schedule a farm visit for the next morning

Once the immediate issue is under control, load the animal only if it can travel without more damage. Many times we stabilize on site and let the vet come to us.

How Mycotoxins in Feed Affect Dairy Cow Fertility

How Mycotoxins in Feed Affect Dairy Cow Fertility

Mycotoxins reach cows through silage, corn, and hay and often show up first as fertility trouble. Conception rates drop, heats stay quiet, and days open stretch out before you notice other signs like lower milk or loose manure.

Which mycotoxins matter most for breeding

Zearalenone acts like extra estrogen. Cows cycle irregularly or develop cysts. Deoxynivalenol (DON) cuts feed intake and weakens the immune response needed for embryo survival. Aflatoxin mainly hits the liver but still lowers conception when levels stay high for weeks.

Mycotoxin Common feed source Fertility sign you notice
Zearalenone Corn silage, high-moisture corn Silent heats, swollen vulva, cystic ovaries
DON Barley, wheat, poor haylage Low dry-matter intake, early embryo loss
Aflatoxin Stored corn, cottonseed Gradual drop in conception after 4-6 weeks

On one 220-cow farm the conception rate fell from 42 % to 28 % over two months. Feed tests later showed 1.8 ppm zearalenone in the corn silage face. Once they pulled that silage and added a glucomannan binder, the rate climbed back within six weeks.

When to test and what to watch

Run a full mycotoxin panel any time you open a new bunker or notice three or more of these in the same string of cows:

  • More than 15 % of cows past 60 days in milk with no recorded heat
  • Breeding dates that keep getting pushed back by 10-14 days
  • Visible vulvar swelling in open heifers or fresh cows
  • Silage that smells musty or shows visible mold on the face

Send samples from the actual TMR, not just the bunker, because mixing changes the final concentration.

Steps that cut exposure right away

  1. Keep the silage face straight and remove at least 15 cm per day so new mold does not form overnight.
  2. Add a glucomannan or yeast-cell-wall binder at 0.5 % of dry-matter intake whenever test results exceed 0.5 ppm zearalenone or 1 ppm DON.
  3. Store ground corn at moisture below 14 % and check temperature weekly; hot spots above 30 °C almost always carry aflatoxin.
  4. Re-test the TMR two weeks after any change in binder or feed source so you know the levels actually dropped.

Most herds see the biggest fertility lift from the first two steps alone. Binder cost usually runs $0.08-0.12 per cow per day and pays for itself once conception improves by even two percentage points.

How to Recognize Early Signs of Respiratory Disease in Feedlot Cattle

How to Recognize Early Signs of Respiratory Disease in Feedlot Cattle

You catch most respiratory cases early by walking pens at the same time each morning and noting which animals skip the bunk or lag behind the group.

Check Feed Intake First

Feed disappearance tells you a lot before any animal looks sick. Walk the bunks and count untouched or half-eaten spots.

  • A steer that normally finishes its ration but leaves 30 percent or more is worth a closer look.
  • Whole pens that clean up slower than the day before often signal the start of an outbreak.
  • Mark the head number on your sheet so you can find the same animal again after the rest have moved.

Watch Breathing and Posture

Normal cattle breathe quietly at rest. Stand still for a minute and count flank movements on any animal that stands apart.

  • More than 40 breaths per minute at rest points to trouble, especially if the animal extends its neck slightly to breathe.
  • A short, dry cough that starts when the group moves is common in early cases.
  • Watch for animals that keep their head lower than usual while standing; they are conserving effort.

Look at Eyes, Nose, and Ears

Discharge and ear position change quickly. Get close enough to see both sides of the face on marked animals.

  • Clear or slightly cloudy nasal discharge that starts in one nostril often appears first.
  • One or both ears held lower than the others can mean fever or pain from the lungs.
  • Dull eyes with reduced blink rate show up before the animal becomes obviously depressed.

Take Temperatures on Suspects

Only pull animals that show two or more of the signs above. A quick rectal temperature confirms the next step.

Reading Action
Under 103.5 F Watch again at evening walk; record intake
103.5 to 104.5 F Pull to hospital pen and start first treatment
Over 104.5 F Pull immediately and check for secondary issues

Write the number and time on the same sheet you used at the bunk so the evening crew knows exactly which animals need rechecking.

Welfare Considerations During Livestock Transport: Best Practices and Legal Updates

Welfare Considerations During Livestock Transport: Best Practices and Legal Updates

You move animals every week. The key is keeping stress low so they arrive in decent condition and you stay on the right side of inspectors.

Load and unload to cut stress

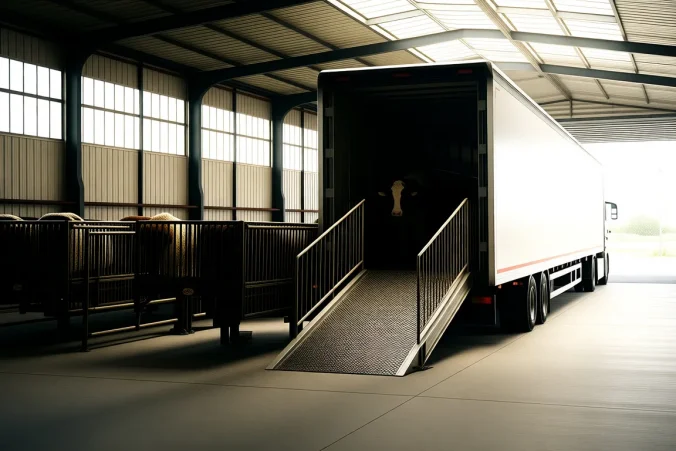
Start with the trailer. Sweep it clean, bed it properly, and check every gate latch before the first animal steps on. Load in small groups rather than a full pen at once. Pigs slip on smooth floors, so lay down rubber mats or extra straw on ramps.

  1. Sort animals by size in the pens the night before so you are not mixing strangers at the last minute.
  2. Walk the route from pen to trailer yourself to spot loose boards or sharp edges.
  3. Load the calmest animals first and the ones that have already been handled near the door last.
  4. Once everyone is on board, wait five minutes before closing the rear gate so any animal that wants to turn around can settle.

Watch conditions while moving

Most problems happen after the wheels start turning. Temperature shifts fast in a moving trailer, and animals cannot move away from drafts or direct sun. Pull over every 90 minutes on longer hauls and walk the outside to listen and smell.

  • For cattle in summer, open side vents fully but keep the top row closed on the sunny side to block direct light.
  • Feeder pigs in winter need extra bedding and a solid windbreak panel on the front; they lose heat quickly when wet.
  • If you hear repeated vocalizing after the first 30 minutes, stop and check for an animal down or one that got separated from its group.
  • Carry a simple log: time, outside temp, and any stops. It takes 30 seconds per entry and satisfies most inspectors.

Stay on top of current rules

Regulations change by state and sometimes by species. Check the federal 28-hour rule first, then the specific state requirements for your route.

Update What changed Practical step
2023 EU-aligned rules in some states Space allowances increased 8% for calves under 6 months Re-measure your trailer compartments before the next calf run
Watering interval Now listed at 12 hours max for hogs in transit in three states Carry a portable water tank and plan a stop every 10 hours instead
Driver training logs Digital records accepted if they include temperature readings Switch to a phone app that timestamps photos of the trailer

Call the destination state’s agriculture department the day before if your load crosses a new border. One phone call prevents a 4-hour hold at the scale.

Preventing Parasite Resistance in Grazing Sheep: Integrated Management Plans

Preventing Parasite Resistance in Grazing Sheep: Integrated Management Plans

Start with fecal egg counts every four to six weeks on your ewes and lambs. That single habit keeps you from treating the whole flock on a calendar and slows resistance on your farm.

You already know the main worm threats in your area. The goal now is to cut unnecessary treatments while still catching the animals that need them.

Build your plan around these steps

  1. Sample ten to fifteen animals from each group. Use a pooled count first. If it stays under 200 eggs per gram, skip treatment.
  2. Treat only the animals that show signs or high counts. Leave the rest to dilute the worm population on pasture.
  3. Move treated sheep to clean pasture or graze them behind cattle. Cattle break the sheep worm cycle.
  4. Record every treatment with date, product, dose, and which animals got it. Review the log at the end of the season.

In early summer, one producer I know checks lambs at six weeks old. Only the ones with rough coats or loose manure get dosed. The rest stay untreated until the next check.

Season Check timing Action threshold
Spring 4 weeks after turnout 300 epg or visible signs
Summer Every 5 weeks 250 epg
Fall Before housing Any count over 200 epg
  • Rotate paddocks so sheep return to the same ground only after 45 days or more.
  • Run a few cattle or goats with the flock when pasture growth slows.
  • Keep refugia by never dosing every animal at once unless a clear outbreak hits.

Watch your records for two years. If you see the same product losing effect, switch classes and keep the sampling schedule tight.

« Older posts